This past weekend I had the opportunity to go to a Copic Color and Ink Workshop in Dallas. This post will share some of the projects we did and techniques we learned in the workshop. I hope you are inspired. I never knew I could do so much with my Copic markers.
I will start with my very favorite part of the workshop - Coloring. Isn't that what markers are for? We learned how to distinguish and color age and skin tone. Here is the difference between a baby and an old man. Old people have lots more shadows and a grayish tint to the skin, whereas babies have plump and smooth skin with few shadows.
We did a variety of images to learn how to color ethnic skins and various types of hair.
Here you see Native American, African American, and Latino/Mediterranean/Middle Eastern skin tones. Also in these pictures are coloring of braided hair and curly hair.
Here is Caucasian skin tones and more samples of hair - up-do hair, straight hair and dreadlocks. There are special techniques used with each of the styles. We actually had more samples to color with different skin and hair colors but time did not permit completing them all. However, I came home with the instructions and can work more.
Moving on to other Copic techniques, we learned how to use Copics to paint on tiles. We did this with a watercolor brush filled with Colorless blender fluid, using the Copic refills in a paint palette. Using the marker directly on the tile would damage the tip of the marker.
This is Copic coloring on fabric. It was fun, and definitely one I will do more of.
We tried pounced Copic inks on metal that had been embossed. Fun! All kinds of home decor would fit in here.
I found this one not one of my favorites, but interesting. Using Yupo paper, we spread Copic ink with the refill bottles to form landscapes. Since the paper does not absorb at all, the ink stayed on the surface and floated around until it dried.
We painted on a black and white photograph with our Copic markers. Interesting squeeky sound and it does not blend well, but is do-able.
We stamped and then colored on shrink plastic and then used the heat tool to shrink it into a charm. Shrink plastic is always fun to watch as it shrivels up and finally lays flat, much smaller than when it started.
Moving on, we tried floating Copic inks on top of shallow water, and then scooping a piece of white cardstock into the water and under to paint to capture it on the card. It could be an interesting background, or cut into smaller sections for an accent.
This is blowing Copic inks with a straw. The ink is dropped from the refill bottle on to glossy paper and then blown with a straw. Straight down blowing makes it spread in a circle, or sideways blowing makes it move on the page.
Copic faux stone, using glossy paper, a pouncer with ink dripped on a felt piece attached to the pouncer. Metallic alcohol ink can also be added for a shiny look
And we even did "Oodles of Doodles" in a journal book. We drew a flower and then filled it in with doodling. It could also be a smaller flower that is open with the doodling around the sides of the flower. Then it could be colored too.
Acrylic and dripped alcohol inks gave an interesting effect. You probably can't see in the photo, but there is a slight white line around the edges of the ink where it spread. This could be used in a journal or as background work. The page is painted with acrylic Gesso first.
Here is another piece of embossed metal. This one was first painted with Gesso and then spread with Copic ink from the refill bottle.
Now moving to Airbrush techniques with Copics. We spent nearly a whole half day doing projects with the airbrush. This first picture is airbrushing using Frisket, a masking fluid that was painted on the cattails and leaves first. Then the airbrush was applied and the mask removed. Last, the cattails and leaves were colored with Copic markers.
We airbrushed a city scape using stencils.
Next is a project using resist bleaching with the Colored blender spritzed on a stamp after airbrushing on cardstock.
One last project was art journal stencils using the airbrush technique.
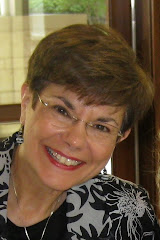
Now a big shout out to my two wonderful Copic teachers at the workshop. They were such excellent teachers.
Left is Colleen Schaan, right is Cindy Lawrence
What a fun 2 days I had playing with Copics. Next year there will be a Copic workshop in Dallas doing whimisical faces and hair and another doing the airbrush techniques. I hope to do the face and hair coloring one.


.jpg)


